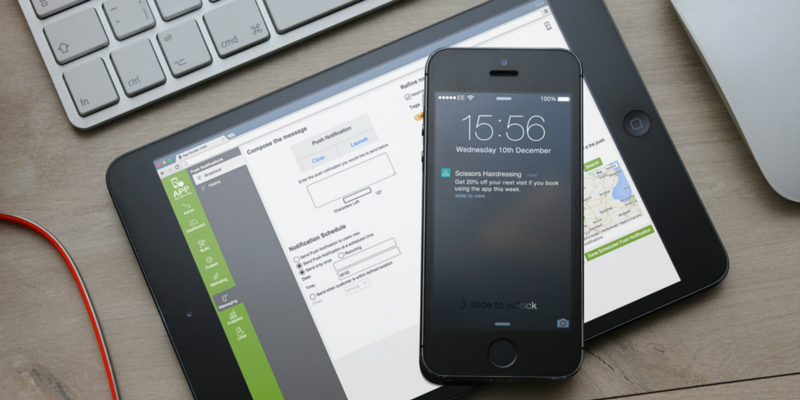
 If you read my Simple Recipe for Delicious Push Notifications post a while back, you’ll know how to choose the best Push Notification content for each of your audience groups, and you’ll have read about Geo-fencing, Targeting and Scheduling your messages for optimum performance.
In this post, I’m going to explain how you can create and send your Push Notifications using the AppInstitute App Builder platform.
Firstly, head to the App Builder and sign in to your account. Then select the Messaging section on the navigation bar to bring up the Push Notifications page.
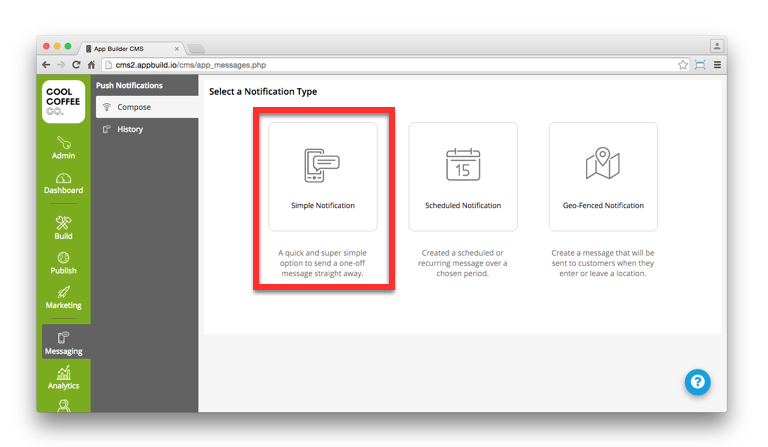
Here is where you will choose the Push Notification type you wish to send out and create it.
There are three types of Push Notifications:
- Simple Notification – A quick and super simple option to send a one-off message straight away.
- Scheduled Notification – Create a scheduled or recurring message over a chosen period.
- Geo-Fenced Notification – Create a message that will be sent to customers when they enter or leave a location.
Simple Notification
There are two audience options to choose from: Send to Everyone and Filter Your Audience.
1. Send to Everyone
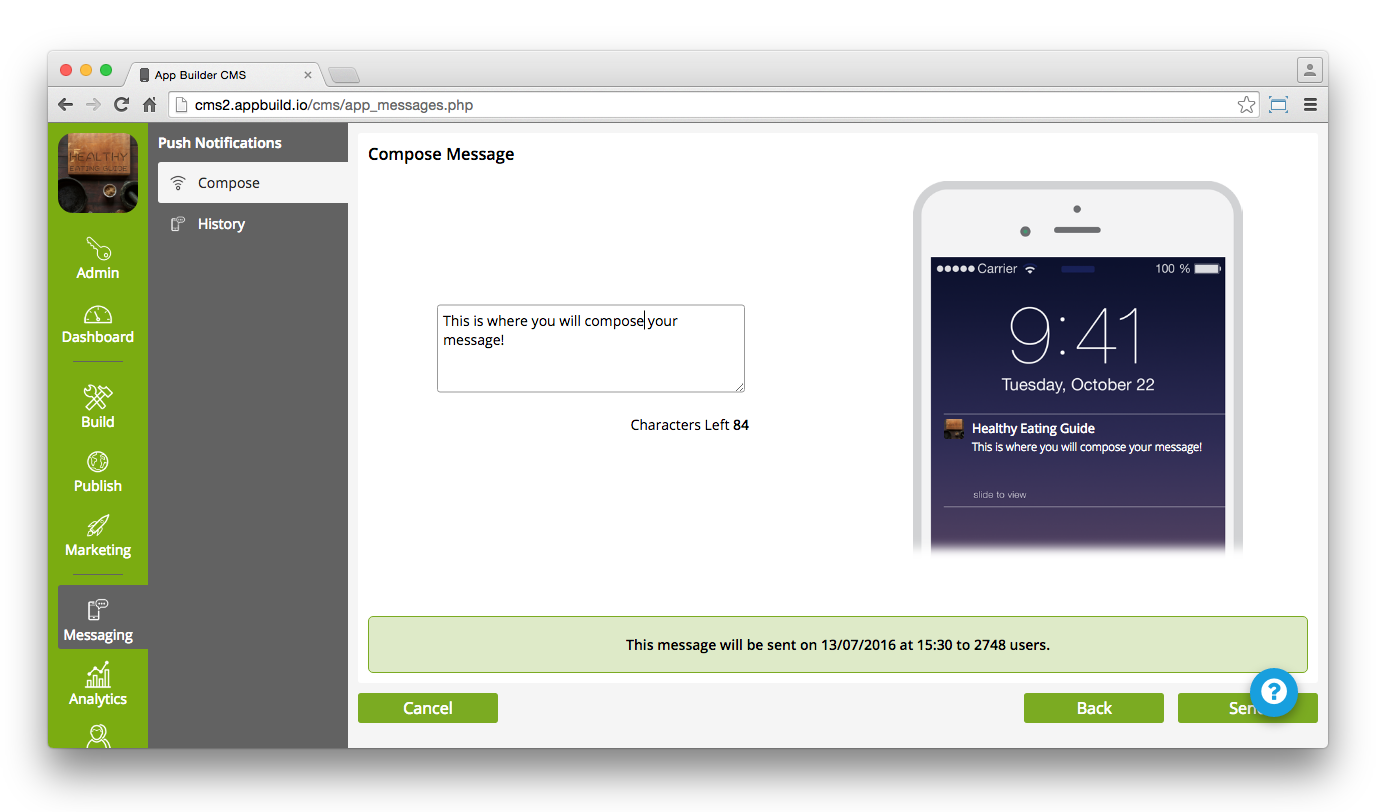
When you choose to send your message to everyone, all you have to do is compose your message in the box and click Save. This will send to all of your App users immediately.
2. Filter Your Audience
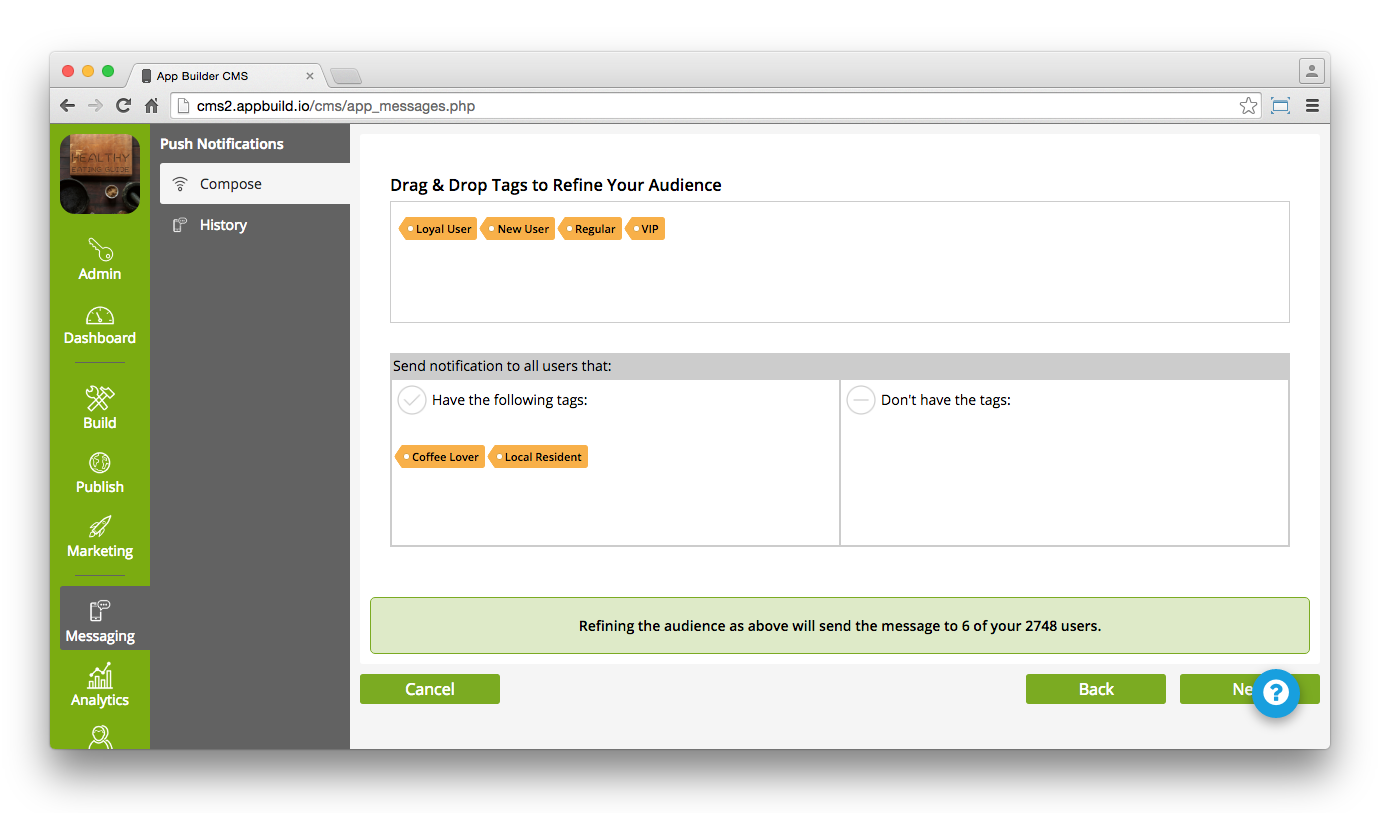
Target your message at specific users by filtering your audience. Drag and drop Tags into the relevant boxes to refine your audience and click Next.
This next step is optional but you can use the drawing tools to define an area and restrict the audience of a push notification to your chosen location and click Next.
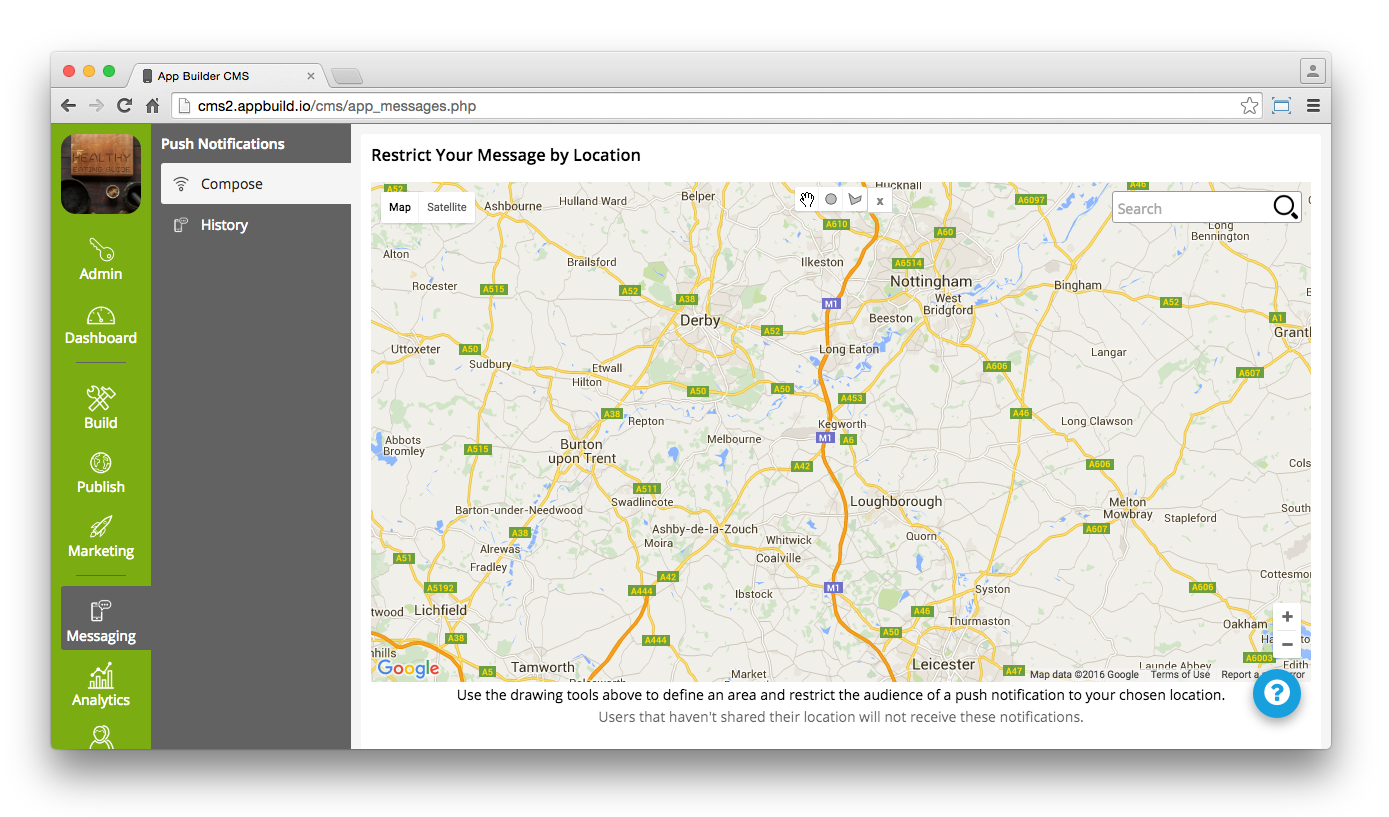
Compose your message in the box (as shown above) and click Save! Your Push Notification will now be sent to the users you have filtered it to.
Best Practices for Writing Effective Push Notifications
Writing engaging push notifications requires clarity and brevity.
Keep messages concise, using action words to prompt immediate attention.
Ensure the content is relevant to your audience and consider including urgency to encourage prompt action.
Testing different message variations can also help identify which styles work best for your audience.
Scheduled Notification
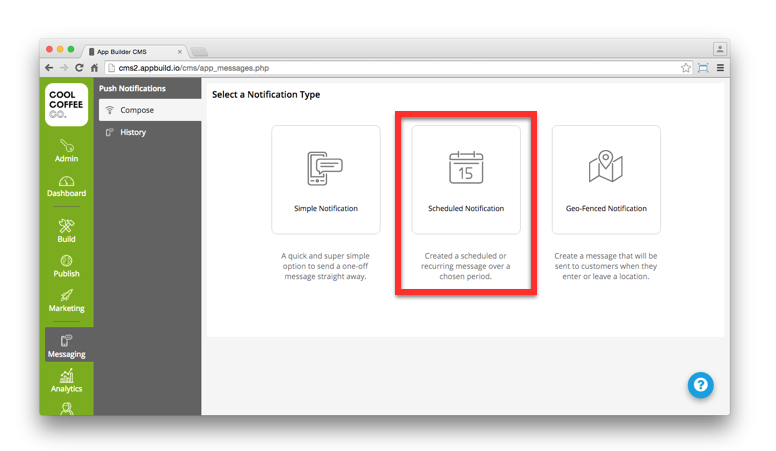
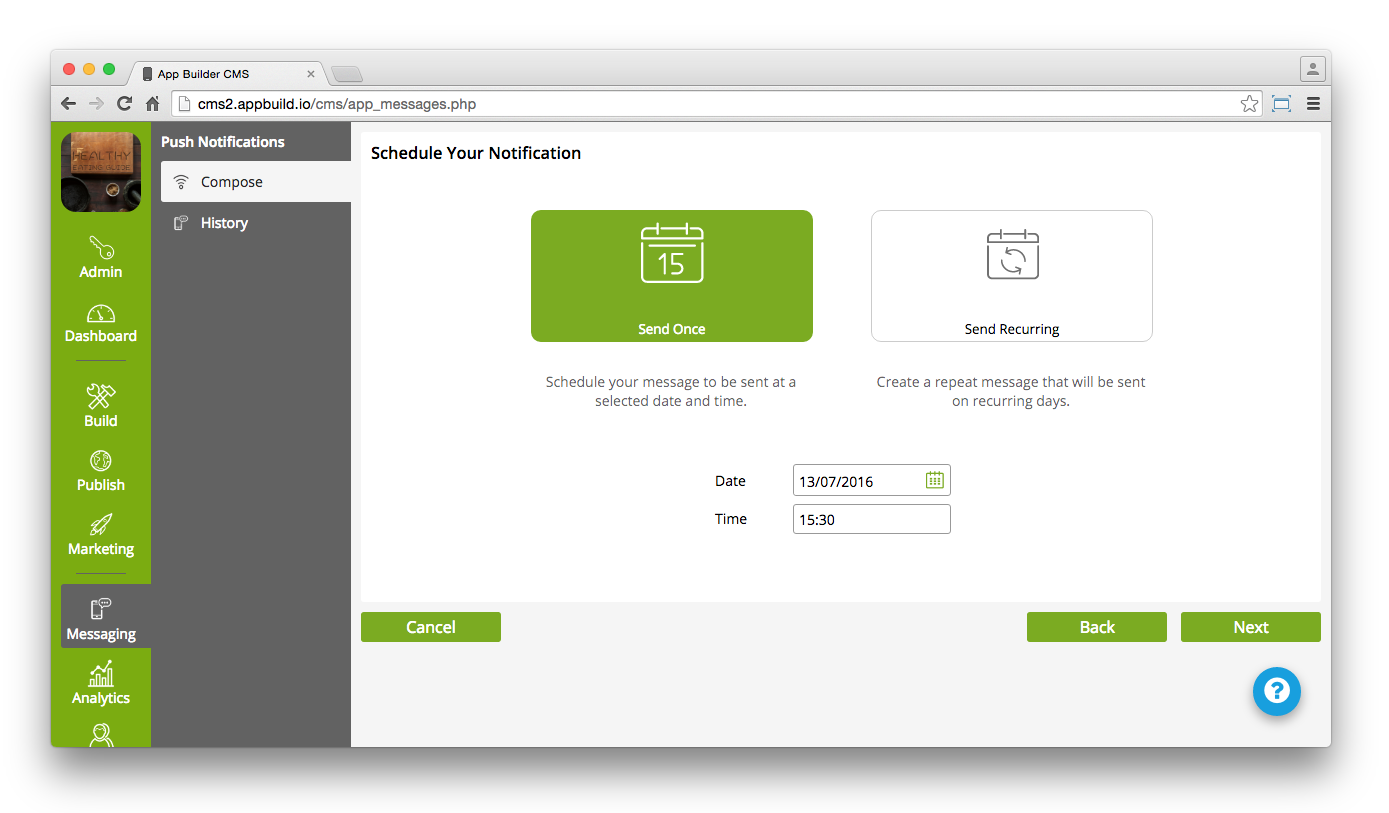
With Scheduled Notification, you can either Send Once or Send Recurring.
1. Send Once – Scheduled
Select the date and time you wish to send the message and click Next.
Again, there are two audience types, Send to Everyone or Filter Your Audience.
Send to Everyone
By choosing Send to Everyone you will be taken to the Compose Message section. Compose your message in the box and see how it looks on the user’s device in the example device screen on the right.
Click Save once you’re happy with your notification. It will then be scheduled and send out to your App users at the time you have chosen.
Filter Your Audience
As mentioned above, drag and drop Tags you wish to target into the relevant boxes then click Next. If you wish, use the drawing tools to define an area and restrict the audience of a Push Notification to your chosen location and click Next.
Use the box to compose your message, then click Save!
Targeting Strategies with Audience Segmentation
Refining your audience through segmentation can dramatically enhance the effectiveness of your notifications.
By segmenting based on user demographics, behaviours, or interests, messages become more relevant and personal, increasing engagement and response rates.
2. Send Recurring
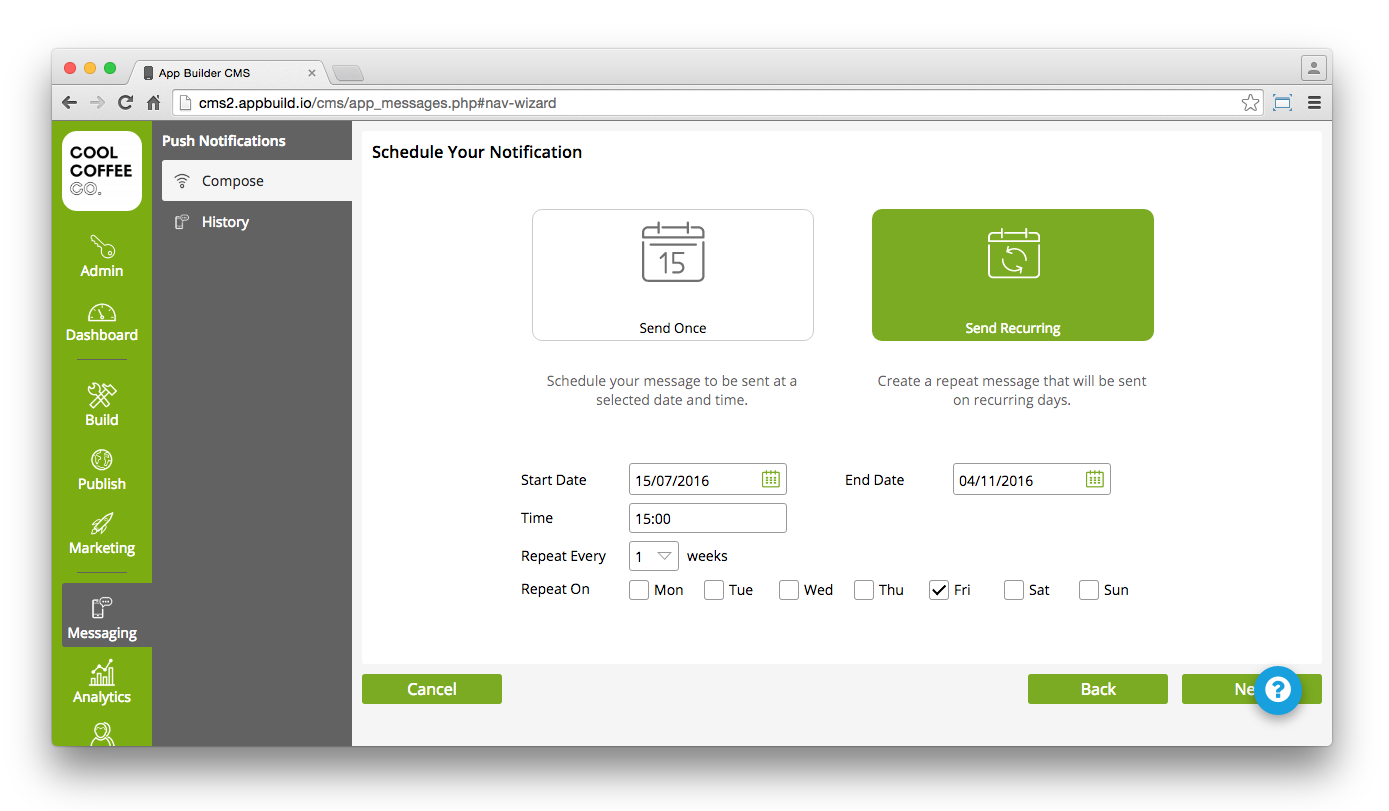
Select the Start and End dates, the time you want the message to send out, how often it repeats and on which day(s) of the week.
The next options are the same as mentioned above: choose whether you Send to Everyone or Filter Your Audience, compose your message and click Save.
Geo-Fenced Notification

Choose whether to send your message to everyone or filter your audience.
1. Send to Everyone
When you choose to send to everyone, you’ll be directed to the map tool where you can use the drawing tools to create your Geo-Fences.
Compose your message in the box and click Save.
2. Filter Your Audience
Drag and drop the Tag(s) you wish to target into the relevant boxes.
Click Next to create the location of your Geo-Fence (as mentioned above) then Next again to compose your message, then Save! Your push notification will then send out at the time you scheduled it.
Benefits of Geo-Fencing in Push Notifications
Geo-fencing offers remarkable advantages for enhancing customer engagement.
By tailoring notifications based on a user’s current location, businesses can deliver messages at the most relevant moments, increasing the likelihood of interaction.
Geo-fencing can boost local sales by targeting users within proximity, encouraging walk-ins or offering time-sensitive promotions.
This allows for personalised marketing strategies that connect with users on a local level.
Message History
The History tab lets your see your Schedules, Geo-Fenced and Past Notifications.
Geo-Fence Notifications
These are your Push Notifications that you have set up to send to a user’s smartphone when they arrive or leave a location. You are able to Copy, Edit and Remove these from the History tab.
Past Notifications
These are the Push Notifications that have already been delivered. You can see the date and time they were delivered. Click “Copy” to use this Push Notification again. This will take you to the Broadcast tab where you can edit and schedule it.
Analytics and Measuring Success of Push Notifications
Utilising analytics is key to understanding the success of your push notifications.
Track metrics such as open rates, click-through rates, and conversion metrics to assess effectiveness.
Use this data to refine your messaging strategy, ensuring future notifications are more targeted and effective.
This continuous improvement cycle is informed by real-world performance results, helping to optimise your approach.
Push Notifications are only included in the Premium and Pro packages. Remember to subscribe to either of these packages when publishing your App!
Legal Considerations and Compliance for Push Notifications
Ensuring compliance with legal frameworks is important when sending push notifications.
Obtain explicit user consent, clearly communicate privacy policies, and adhere to regulations like GDPR, to maintain trust and avoid potential penalties.

You might also find useful:
Types of Push Notifications & How To Use Them
8 Ideas To Incentivise Your App Downloads
0 thoughts on “How To Create and Send Push Notifications”